
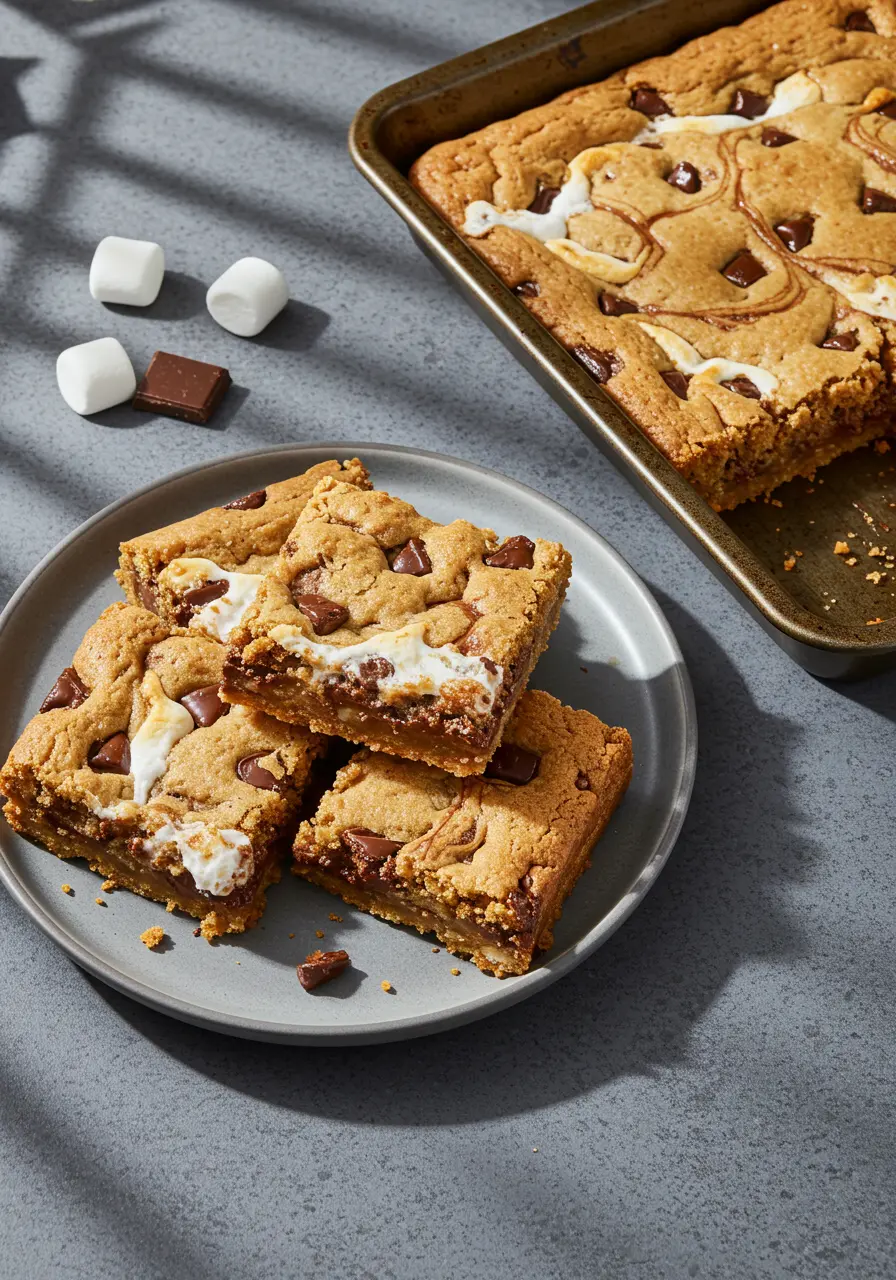
There’s something magical about the classic combination of graham crackers, chocolate, and marshmallows that takes us straight back to childhood campfires and summer evenings. But why limit this heavenly trio to outdoor adventures? These S’mores Cookie Dough Bars bring all those nostalgic flavors into your kitchen, transforming them into a gooey, decadent treat that can be enjoyed year-round—no campfire required!
These bars feature a buttery soft cookie dough base studded with digestive biscuit pieces (or graham crackers for American bakers), layers of rich milk chocolate, and a heavenly marshmallow fluff center that creates that perfect pull-apart gooey texture we all crave. The result? A dessert that captures the essence of s’mores but with the added pleasure of a chewy cookie texture.
One reader, Emma, says: “These S’mores Cookie Dough Bars were an absolute hit at our family gathering! The combination of the soft cookie base with the marshmallow and chocolate was divine. Everyone asked for the recipe and there wasn’t a single crumb left! ★★★★★”
S’mores Cookie Dough Bars: A Closer Look
Flavor Profile
The beauty of these S’mores Cookie Dough Bars lies in how they balance three distinctive elements. The digestive biscuit-infused cookie dough provides a buttery, slightly salty base that perfectly complements the sweetness of the milk chocolate and marshmallow layers. Each bite delivers that perfect harmony of flavors that makes traditional s’mores so irresistible, but with the added richness of cookie dough.
Texture Experience
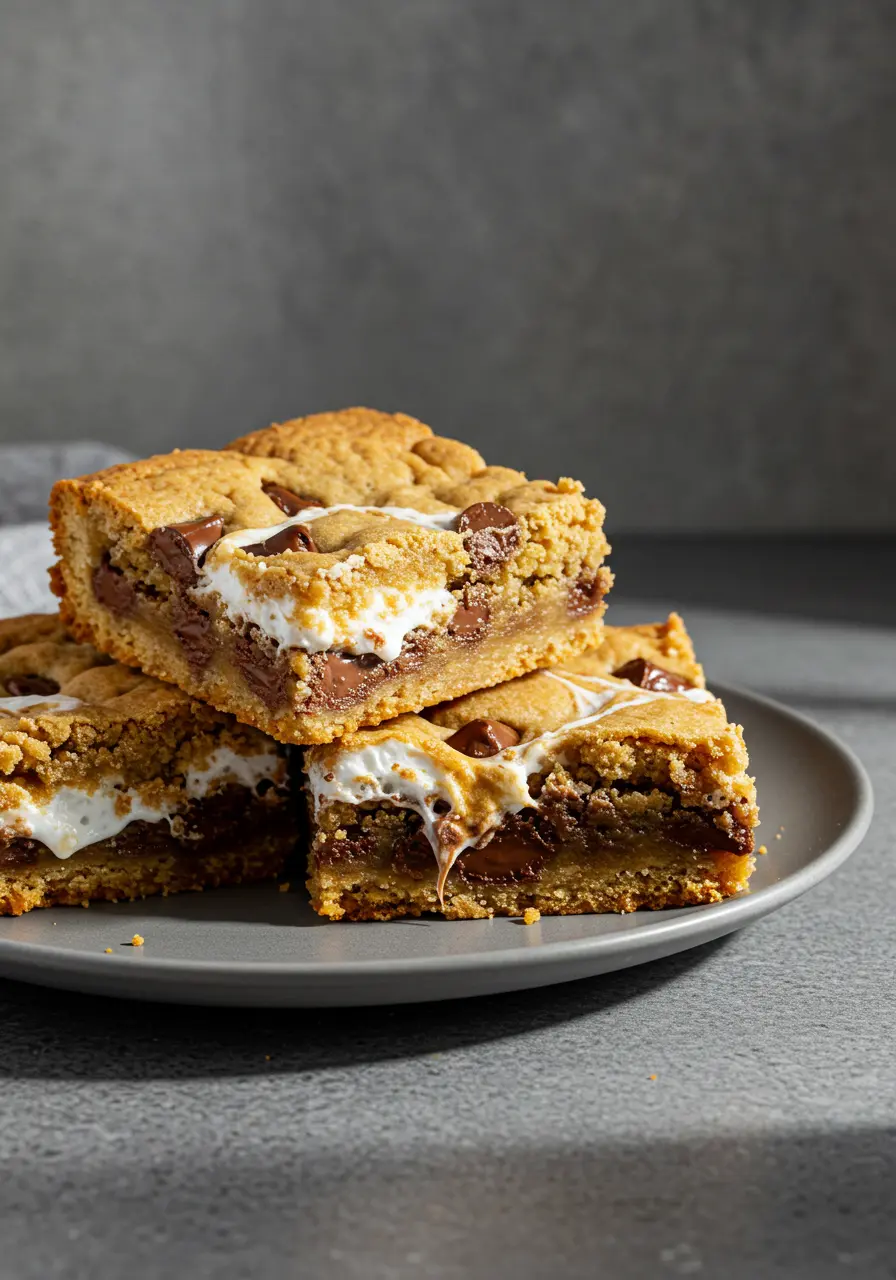
Prepare yourself for a textural adventure! The cookie dough portions bake up soft and chewy with slight crumbly bits from the digestive biscuits. This contrasts beautifully with the melty chocolate bars and the pillowy, stretchy marshmallow fluff center. The bars firm up as they cool but maintain that signature gooey middle that makes you reach for “just one more piece.”
Ease of Preparation
While these bars might look impressive, they’re surprisingly straightforward to make. The most challenging part might be handling the sticky cookie dough and marshmallow fluff, but I’ll share some helpful tips below to make the assembly process smoother. Trust me—even if your layers aren’t picture-perfect, the oven works its magic to meld everything together beautifully.
The Four Essential Layers
1. Cookie Dough Base
Unlike typical s’mores that use plain graham crackers, we’re incorporating the graham flavor directly into a soft, chewy cookie dough. This creates a more substantial and satisfying base while still honoring the classic flavor profile.
2. Milk Chocolate Layer
Two full chocolate bars create a substantial layer of melty goodness. As the bars bake, the chocolate softens to the perfect consistency—not completely melted, but gloriously soft and gooey.
3. Marshmallow Fluff Center
This is where the magic happens! Marshmallow fluff maintains its structure during baking, unlike regular marshmallows which would simply melt away. The result is that perfect stretchy, gooey marshmallow pull when you bite into these bars.
4. Cookie Dough Top Layer
The final layer of cookie dough doesn’t completely cover the marshmallow and chocolate—and that’s intentional! Those little glimpses of marshmallow peeking through create beautiful caramelized spots and visual appeal.
How These Bars Come Together
To make these S’mores Cookie Dough Bars, we start with a butter-rich cookie dough that’s been enhanced with crushed digestive biscuits. About half of this dough forms the base layer in our baking tin. Next comes the chocolate bars, laying flat to create a solid chocolate layer. The marshmallow fluff gets dolloped and gently spread over the chocolate, creating our gooey center.
For the top layer, we don’t aim for perfection! Instead, take portions of the remaining cookie dough, flatten them between your palms, and arrange them like a patchwork quilt on top. Those gaps are desirable—they allow the marshmallow to peek through and create those beautiful golden spots during baking.
Important Note: Never substitute regular marshmallows for the marshmallow fluff in this recipe. Regular marshmallows will melt completely, disappear into the dough, and create unattractive hollow spaces in your bars. Marshmallow fluff has the stability to withstand baking while maintaining its distinctive texture.
Perfect Occasions for S’mores Cookie Dough Bars
These versatile treats are appropriate for virtually any occasion:
- Summer picnics and BBQs
- Children’s birthday parties
- Bake sales and school events
- Holiday cookie exchanges
- Movie nights at home
- Weekend family treats
- Office potlucks
I’ve even served these at more formal gatherings, cut into dainty squares, where they disappeared faster than any fancy dessert on the table!
Success Tips for Perfect Bars Every Time
- Line your baking tin: Use parchment paper with overhang for easy removal after cooling
- Room temperature ingredients: Especially important for the butter and eggs to achieve the right dough consistency
- Sticky dough solution: Lightly wet your hands when pressing the dough into the tin to prevent sticking
- Spreading marshmallow fluff: Coat your spatula with a tiny bit of neutral oil to make spreading the fluff easier
- Cooling time matters: Allow the bars to cool completely in the tin before cutting for cleaner slices
- Storage wisdom: These bars actually taste even better on day two when the flavors have had time to meld!
Why You’ll Love These S’mores Cookie Dough Bars
These bars are more than just another dessert—they’re an experience. The nostalgic flavors of childhood campfires combined with the comforting embrace of soft cookie dough create something truly special. Whether you’re making them for a crowd or as a weekend treat for your family, these S’mores Cookie Dough Bars are guaranteed to bring smiles and requests for the recipe.
The beauty of this dessert lies in its imperfection—those bubbling marshmallow spots, the slightly uneven top, the random bursts of chocolate throughout. It’s rustic, homemade charm at its finest, delivering flavors that are sophisticated enough for adults while remaining utterly irresistible to children.
So the next time you’re craving s’mores but don’t have access to a campfire, or you simply want an elevated version of this classic treat, these S’mores Cookie Dough Bars are your answer. They capture all the magic of traditional s’mores with the added bonus of a soft, chewy cookie base that takes the experience to an entirely new level.
Print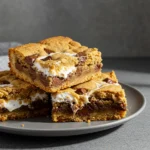
S’mores Cookie Dough Bars
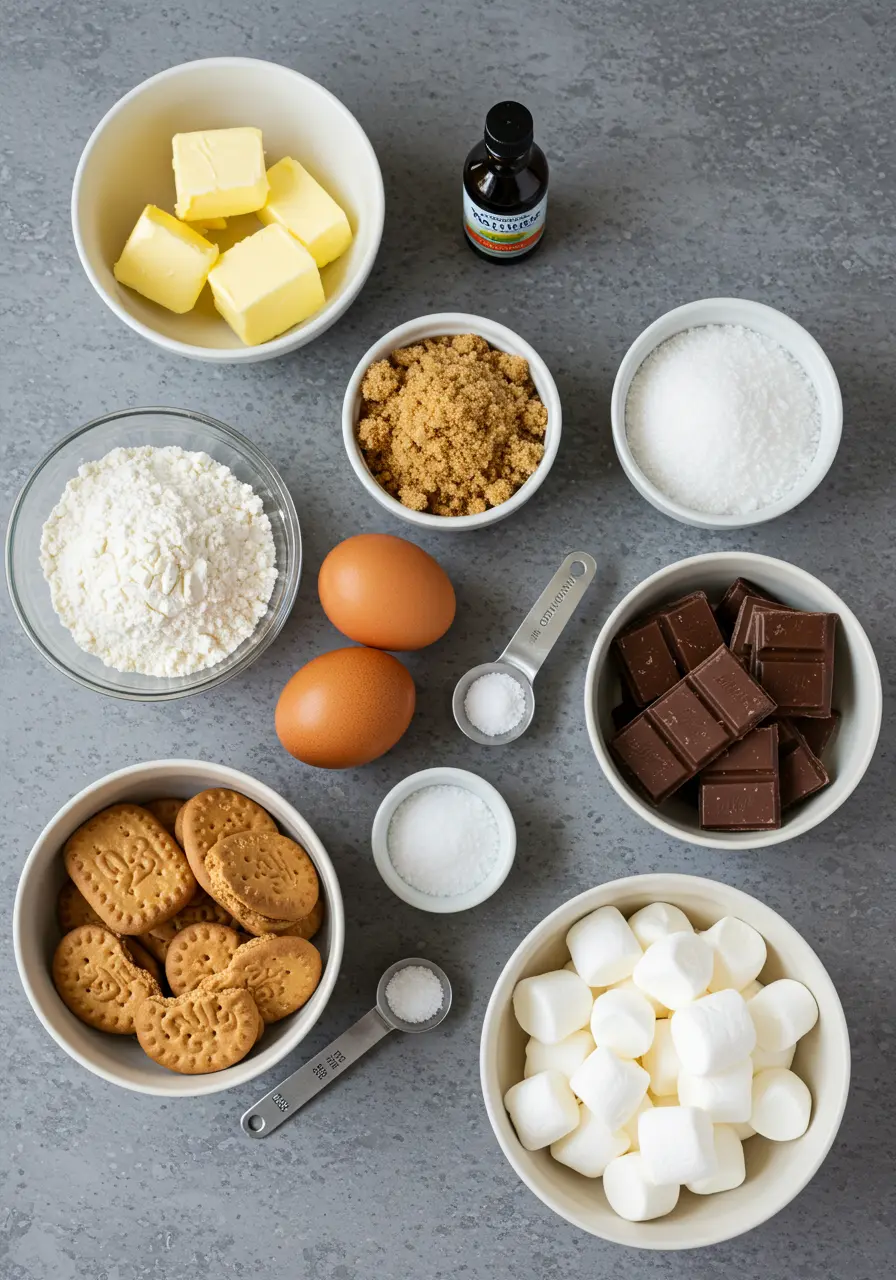
Ingredients
- 225g unsalted butter, softened
- 150g light brown sugar
- 75g granulated sugar
- 2 large eggs, room temperature
- 1 tsp vanilla extract
- 270g plain flour
- 1 tsp bicarbonate of soda
- 1 tsp salt
- 200g chocolate chips (plus 20g extra for topping)
- 100g Digestive biscuits, broken into pieces (or graham crackers for US bakers)
- 2 x 200g milk chocolate bars
- 1/2 tub marshmallow fluff (approximately 120g)
Instructions
- Prepare your workspace: Preheat your oven to 150°C (300°F) fan-forced or 170°C (340°F) conventional. Line your 8×8 inch square baking tin with parchment paper, leaving some overhang on the sides for easy removal later.
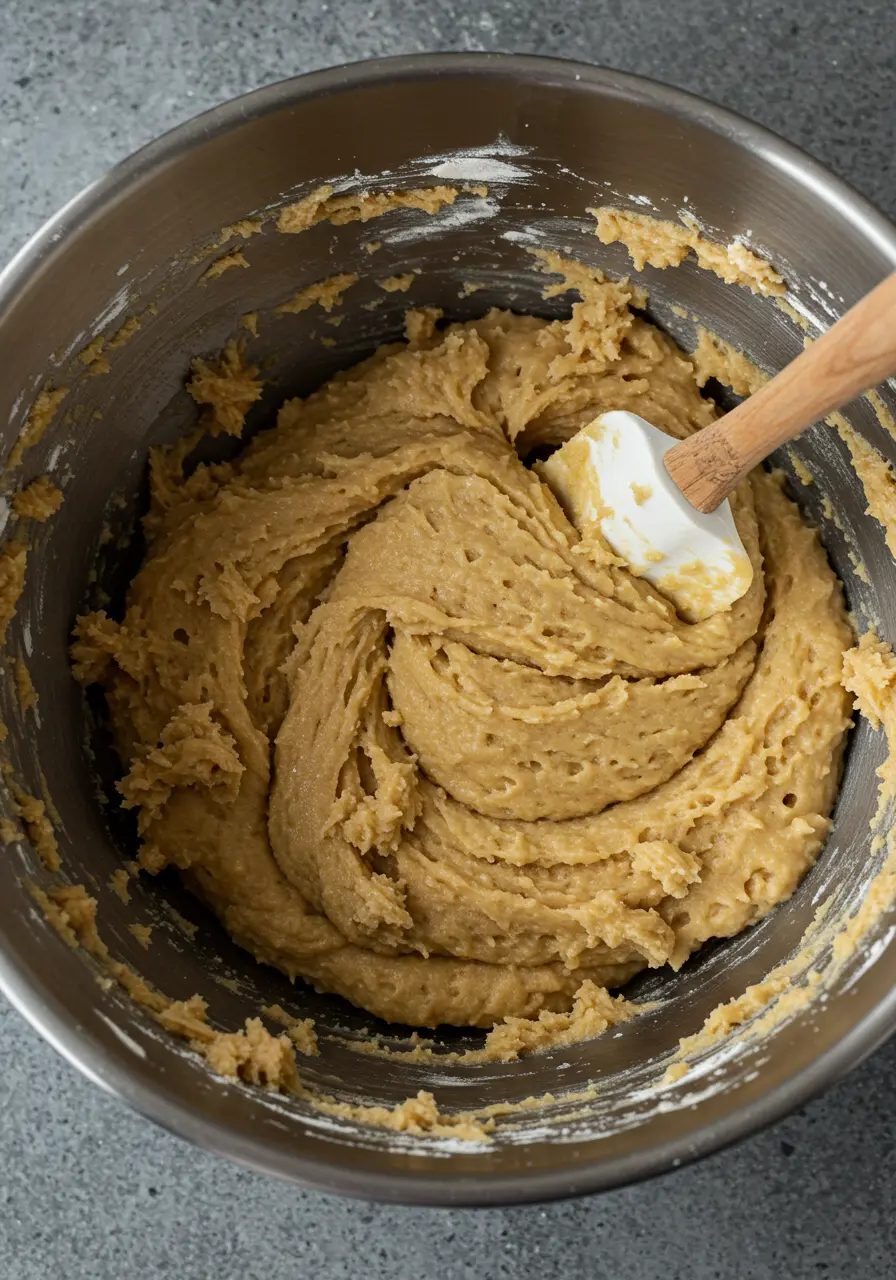
- Make the cookie dough base: In a large mixing bowl, combine the softened butter, light brown sugar, and granulated sugar. Whisk vigorously until the mixture becomes light and fluffy, about 2-3 minutes. Add the eggs and vanilla extract, then mix until fully incorporated and smooth.
- Add dry ingredients: Gently fold in the plain flour, bicarbonate of soda, and salt until just combined. Be careful not to overmix at this stage. Add 200g of chocolate chips and the broken digestive biscuit pieces, folding them through until evenly distributed throughout the dough.
- Layer the base: Take approximately half of your cookie dough and press it into an even layer in the bottom of your prepared baking tin. This will form the foundation of your bars.
- Add chocolate layer: Place your chocolate bars directly on top of the cookie dough base, breaking them if necessary to create a complete layer that covers the dough.
- Add marshmallow layer: Carefully spoon the marshmallow fluff over the chocolate layer and gently spread it into an even layer. This can be tricky as the fluff is sticky, so use a lightly oiled spatula to help with spreading.
- Top layer assembly: Take the remaining cookie dough and divide it into small portions. Flatten each portion between your palms and arrange them on top of the marshmallow layer. Don’t worry about creating a perfect seal—the gaps where marshmallow peeks through will create beautiful caramelized spots during baking.
- Final touch: Sprinkle the additional 20g of chocolate chips over the top layer of cookie dough.
- Bake: Place your tin in the preheated oven and bake for 35-45 minutes, or until the top is golden brown and the center no longer wobbles when you gently shake the tin.
- Cool completely: This is crucial! Allow the bars to cool completely in the tin before attempting to remove or cut them. This will take at least 2 hours. The bars will continue to set as they cool.
- Slice and serve: Once completely cooled, use the parchment paper overhang to lift the bars out of the tin. Place on a cutting board and slice into 16 even squares with a sharp knife.
Notes
Prep Time: 15 minutes | Bake Time: 35-45 minutes | Cooling Time: 2 hours | Total Time: 3 hours | Yield: 16 bars