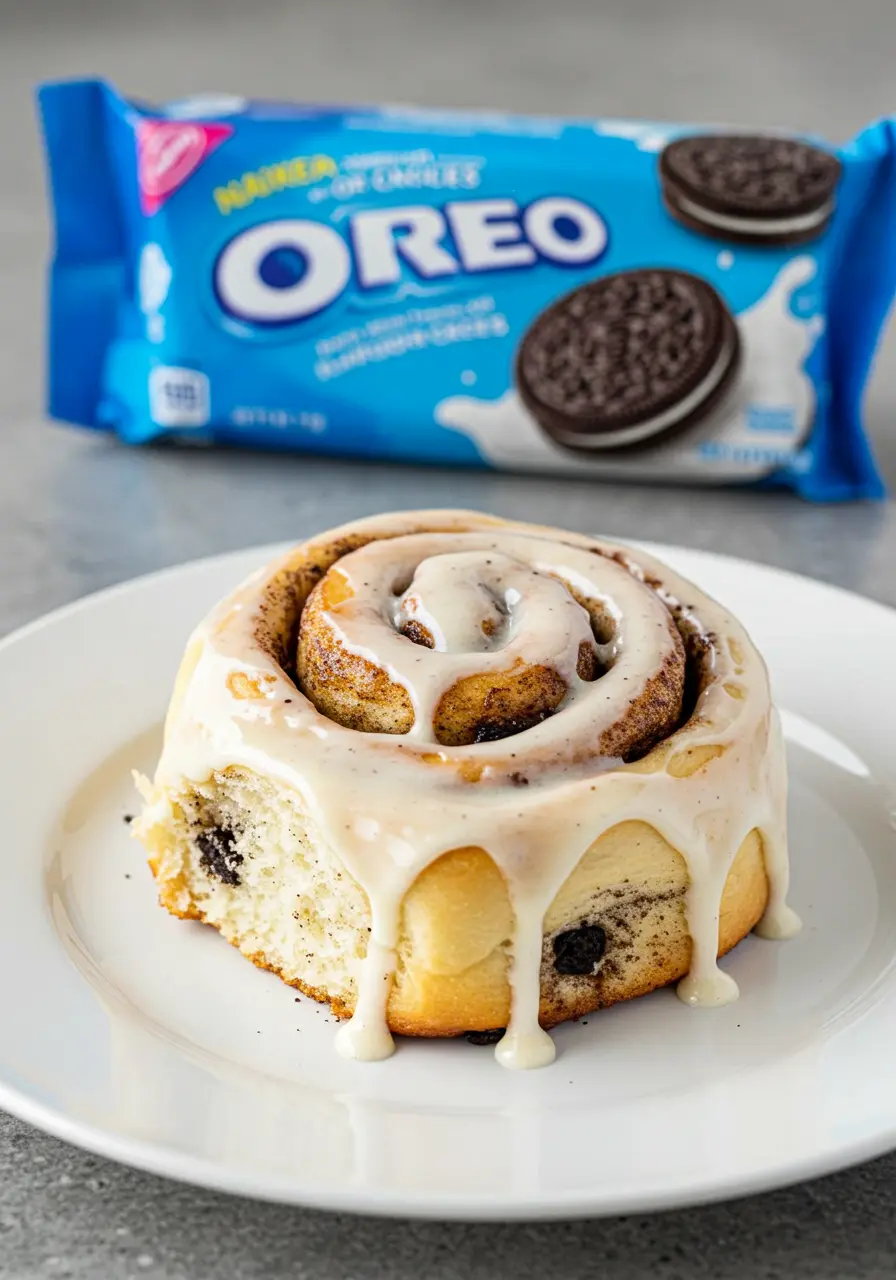
Ever since I discovered the joy of quick yeast cinnamon rolls, they’ve become a staple in our weekend breakfast rotation. Recently, I decided to experiment with flavors and created these indulgent Oreo Cinnamon Rolls – a delicious twist that essentially gives you permission to enjoy cookies for breakfast!
The combination of a rich chocolate filling with crushed Oreo cookies and a generous drizzle of sweet vanilla glaze makes for an irresistible morning treat that’s perfect for special occasions or simply making an ordinary weekend feel extraordinary.
The Secret Behind These Oreo Cinnamon Rolls
What makes an Oreo cookie instantly recognizable is its distinctive chocolatey flavor and signature dark color. To capture both these elements in these Oreo Cinnamon Rolls, I’ve incorporated black cocoa powder into the filling.
Black cocoa powder has a slightly higher pH than Dutch-processed cocoa (approximately 8 versus 7) and is less acidic than natural baking cocoa (which typically has a pH of 5-6). This unique chemistry creates that distinctive bittersweet chocolate flavor that’s unmistakably reminiscent of an Oreo cookie!
The flavor profile is absolutely divine and pairs wonderfully with the hints of brown sugar and cinnamon in the filling. It’s this combination that elevates these rolls from a simple breakfast pastry to a memorable treat.
Can’t find black cocoa? No worries! Dark cocoa powder works wonderfully as a substitute. Hershey’s offers a popular version that’s readily available in most grocery stores.
Understanding Flour Measurements
One aspect of this recipe that might seem intimidating is the variable flour amount. You’ll notice on the recipe card that it isn’t specified as a fixed quantity.
Despite my best efforts to determine the “perfect” amount, the reality is that it will vary from batch to batch and kitchen to kitchen. Environmental factors like humidity and altitude can significantly impact how much flour your dough requires.
I’ve made these Oreo Cinnamon Rolls by hand, with a stand mixer, in my New York City apartment, and in my childhood home in Seattle. Each time, I’ve needed to adjust the flour slightly.
The recipe starts with a base of 3½ cups of all-purpose flour. As you incorporate the wet ingredients and a sticky dough forms, you’ll gradually add additional flour as needed.
I recommend adding flour one tablespoon at a time while kneading the dough until you achieve an elastic, workable consistency that can be rolled out properly. However, be cautious not to add too much, as excess flour can result in dense, chewy cinnamon rolls rather than light, fluffy ones.
When using my stand mixer, I typically add between 4-6 additional tablespoons during the kneading process. Some batches might require less, while others might need the full additional ½ cup of flour mentioned in the recipe.
Hand Mixing vs. Stand Mixer
The first few times I made cinnamon rolls was during holiday visits home, where I didn’t have access to a stand mixer. This recipe is versatile enough to be prepared either by hand or with a dough hook attachment on a stand mixer.
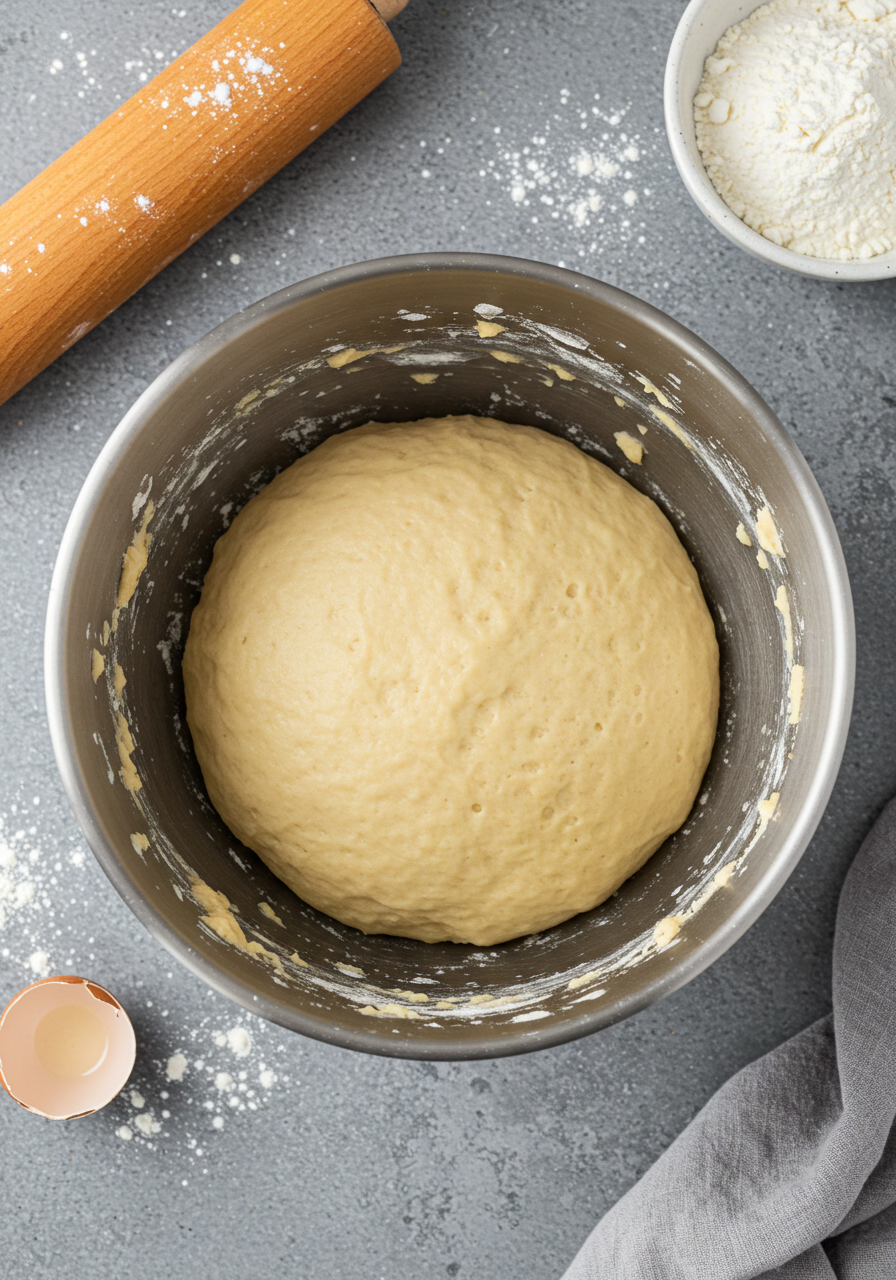
Regardless of your method, the key is to knead or mix the dough until it develops an elastic texture and pulls away from the bowl or counter. The dough should feel tacky but not sticky when it’s ready for resting.
A simple test I use is pressing my finger into the dough – it should feel slightly tacky to the touch but shouldn’t leave residue on your finger when you pull away.
Once the dough reaches this consistency, stop working it and allow it to rest for 10-15 minutes. Continuing to knead beyond this point can cause the gluten strands to become too tight, which, like adding too much flour, can result in dense cinnamon rolls.
If you’re kneading by hand, you’ll likely develop an intuitive sense of when the dough is ready. When using a stand mixer, keep a watchful eye on your dough to prevent overworking it accidentally.
The Perfect Topping
No cinnamon roll is complete without a delicious topping to finish it off!
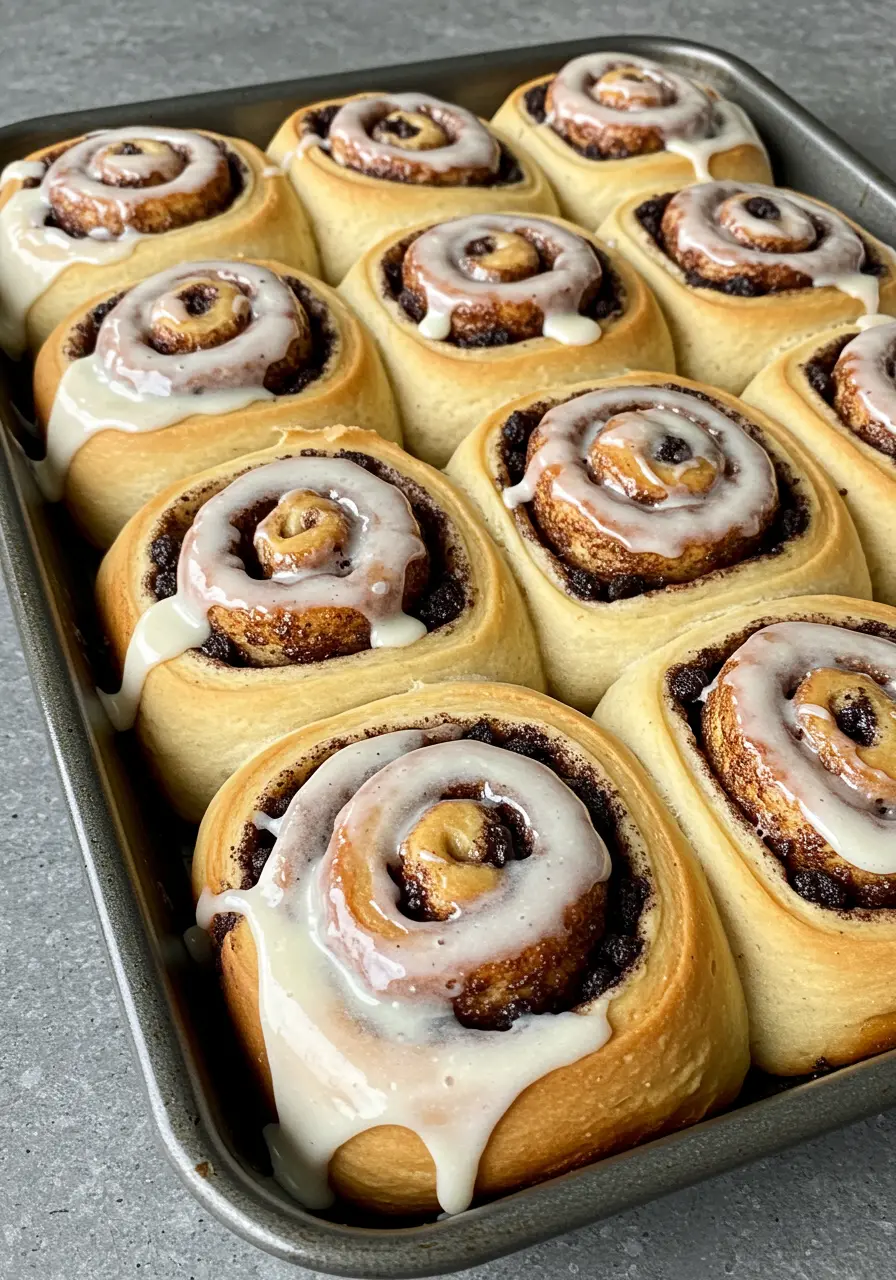
While traditional options like cream cheese frosting or American buttercream would work beautifully with these Oreo Cinnamon Rolls, I found that a simple vanilla glaze provides the perfect complement to the rich chocolate filling.
If you prefer a more traditional frosting, feel free to use your favorite! The versatility of these rolls means they pair well with various toppings.
For those who opt for the vanilla glaze like I did, achieving the right consistency is key. The glaze should be thick enough to drizzle over your finger and maintain its shape without being too runny. I demonstrate this test in the video accompanying this recipe post.
Substitutions and Swaps
I love this recipe as written, but I understand that you might not have all the ingredients on hand or may have specific dietary needs. Here are some tested substitutions:
- All-Purpose Flour: While I haven’t personally tested this recipe with gluten-free flour, a quality blend like King Arthur’s GF flour should work well. Just be prepared to knead the dough a bit longer to help develop structure.
- Unsalted Butter: Salted butter can be substituted if that’s what you have available. Simply omit the salt called for in the recipe. Vegan butter also works as a direct replacement.
- Whole Milk: Most alternative milks perform well in this recipe, including soy, oat, and almond varieties.
- Instant/Rapid Rise Yeast: Active dry yeast can be used instead of instant, but you’ll need to activate it before adding it to the dough and allow for longer rising times, as active yeast works more slowly than instant.
- Large Egg: For an eggless or vegan version, a flaxseed egg makes an excellent substitute in this enriched dough.
Tips for Making the Best Oreo Cinnamon Rolls
- Use a ruler when rolling out your dough to ensure it reaches the proper dimensions (12 in x 18 in) and can be cut into even pieces.
- Dental floss makes cutting each roll clean and easy, much better than using a knife which can compress the dough.
- Allow the rolls to cool for 5-10 minutes before adding the glaze. This timing allows the glaze to melt perfectly over your cinnamon rolls without completely dissolving.
- Cut only 9 rolls from your log to create tall, fluffy cinnamon rolls. More rolls will result in smaller, less impressive pastries.
- Use a square baking pan (approximately 8 in x 8 in) for best results.
Make-Ahead Instructions
One of the best features of these Oreo Cinnamon Rolls is that they can be prepared in advance, making your morning routine much simpler.
To prepare them the night before:
- Follow the recipe through the point of cutting and placing the rolls in a greased or lined pan
- Cover the pan tightly with plastic wrap, ensuring an airtight seal to prevent the dough from drying out
- Refrigerate overnight
- The next morning, remove the rolls from the refrigerator about an hour before you plan to bake them
- Follow the remaining instructions for baking
Alternatively, you can bake the cinnamon rolls completely, allow them to cool, and then freeze them individually:
- Leave the rolls unfrosted
- Wrap each roll tightly in a layer of plastic wrap followed by foil
- Transfer frozen rolls to the refrigerator the night before you want to enjoy them
- The next morning, unwrap the roll and microwave until warm and gooey (typically about 30 seconds)
Let Me Know What You Think!
If you try this Oreo Cinnamon Rolls recipe, I’d love to hear your thoughts! Please leave a rating and comment below.
You can also tag me on social media or use #oreocinnamon so I can see your delicious creations!
Print
Oreo Cinnamon Rolls
Description
These Oreo cinnamon rolls are truly scrumptious! They’re made with a dark chocolate Oreo filling & are topped with a delicious vanilla glaze!!
Ingredients
Chocolate Oreo Cinnamon Roll Filling
- 1/2 cup packed light brown sugar (100g)
- 2 Tbsp black cocoa powder (12g)
- 1 tsp ground cinnamon (3g)
- 1/4 cup unsalted butter, softened – to be spread on the dough (56g)
- 1/2 cup crushed Oreos (50g)
Oreo Cinnamon Roll Dough
- 3 1/2 cups all-purpose flour + up to 1/2 cup additional flour to be added later in process (440g-500g)
- 2 tsp or 1 packet instant dry yeast (7g, 1/4 oz.)
- 1 tsp fine salt (6g)
- 1 cup whole milk (240g)
- 1/2 cup granulated sugar (100g)
- 1/4 cup unsalted butter, room temperature (56g)
- 1 large egg, room temperature (56g)
- 1/2 cup crushed Oreos (50g)
Vanilla Glaze
- 1 Tbsp unsalted butter, room temperature (8g)
- 1 1/2 cups powdered sugar (188g)
- 2 Tbsp whole milk (30g)
- 1 tsp artificial vanilla extract (4g)
Instructions
Chocolate Oreo Cinnamon Roll Filling
- In a medium sized bowl, mix together 1/2 cup packed light brown sugar, 2 tablespoons of black cocoa, and 1 teaspoon of ground cinnamon and set aside.
Oreo Cinnamon Roll Dough
- Preheat your oven to 200°F / 95°C.
- In a large bowl or the bowl of a stand mixer, combine 3 1/2 cups of flour, 1 packet instant dry yeast (or about 2 teaspoons), and 1 teaspoon salt.
- In a separate bowl, add 1 cup milk, 1/4 cup softened butter, and 1/2 cup granulated sugar into a microwave safe bowl.
- Heat on high power for 60-90 seconds, until the mixture is warm to the touch and the butter is melted. Stir to combine the ingredients.
- Gradually add the warm milk mixture into the flour mixture and mix on medium speed with a dough hook until the dough comes together.
- Add in the egg and mix on a low speed until a sticky dough ball forms. Continue to mix on a medium low speed for 2-3 minutes, until the dough becomes more elastic.
- As the dough mixes, add in additional flour 1 Tbsp at a time until the dough begins to leave the sides of the bowl. My favorite way to know if my dough is ready is to poke it with my finger. It should feel tacky but not sticky. As you pull your finger away, there should be no residue on your finger.
- Once you’re done adding in the additional flour, mix in 1/2 cup of crushed Oreos on a medium speed. Mix until the Oreos are incorporated throughout the dough.
- Cover your bowl with plastic wrap and set aside to let the dough to rest for 10 minutes. The plastic wrap should fog up a bit from the warmth of the dough.
- Generously flour your counter and roll your dough ball into a large rectangle that’s 12 inches x 18 inches. It should be about 1/2 cm thick.
- Spread 1/4 cup of softened butter over the dough, leaving 1/2 inch on the long side of the rectangle uncovered.
- Sprinkle the cinnamon roll filling (instructions above) evenly over the buttered area, and top with 1/2 cup of crushed Oreos.
- Tightly roll the dough horizontally toward the uncovered strip.
- Cut dough log into 9 equal pieces with dental floss (you can cut it into more pieces if you want smaller/shorter cinnamon rolls) and place in a greased square pan (mine is 8 in x 8 in).
- Turn the oven off! I REPEAT, TURN THE OVEN OFF.
- Cover the cinnamon roll pan with foil and place in a the oven for 30 minutes (or until the cinnamon rolls have risen).
- Remove the pan from the oven and take off the tinfoil. Turn the oven back on, and heat to 350°F / 175°C.
- Once the oven has preheated to 350°F / 175°C, bake for 26-30 minutes or until rolls are golden brown. Rotate the pan halfway through to help the rolls bake evenly.
Vanilla Cinnamon Roll Glaze
- To make the vanilla cinnamon roll glaze, add 1 Tbsp of unsalted butter, 1 1/2 cups of powdered sugar, 2 tablespoons of whole milk and 1 teaspoon artificial vanilla extract in a medium-sized bowl. Mix together until smooth.
- Let the cinnamon rolls cool for 10-20 minutes, then drizzle the glaze over the cinnamon rolls. Garnish with some extra chopped up Oreos and serve warm.
Notes
Using the Right Type of Yeast: Active vs. Instant Yeast
- Be sure you are using instant yeast! It comes in small packets that can usually be found in the refrigerated section of your grocery store.
- You can use active dry yeast in place of the instant yeast in this recipe, just allow the dough to rise for longer (active yeast takes longer to rise than instant).
Tips for Making the Best Oreo Cinnamon Rolls
- Use a ruler to make sure your dough is rolled out to the right size (12 in x 18 in) and cut into even pieces.
- Use dental floss to easily cut each cinnamon roll rather than a knife.
- If you’re struggling to cut your cinnamon rolls, place the cinnamon roll log on a baking sheet and chill it in the fridge for 20-30 minutes. It will make it easier to cut.
- Cut 9 equal-sized cinnamon rolls from your log to make sure they all bake evenly.
- Try to let the cinnamon rolls cool for about 10-20 minutes, then add the glaze. This will allow it to perfectly melt over your cinnamon rolls!
Making these Cinnamon Rolls in Advance
- This recipe can be made the evening before and baked the following morning.
- You can refrigerate these cinnamon rolls after they have been cut in a greased or lined pan. Cover the cinnamon roll pan tightly with plastic wrap, making sure the seal is airtight.
- The morning you want to bake them, take them out 1-2 hours before you plan to bake them to let them warm up and rise a bit. Then follow the recipe instructions to bake in step 18.
Prep Time: 15 minutesCook Time: 26 minutesAdditional Time: 30 minutesTotal Time: 1 hour 11 minutes






Leave a Reply