

Cookies and Cream Cake Pops are the perfect bite-sized treat, combining the rich, chocolatey goodness of cake with the irresistible crunch of Oreo cookies. Inspired by the famous Starbucks version, this simple and fun recipe makes an ideal snack for parties, birthdays, or any sweet tooth craving.
What Are Cookies and Cream Cake Pops?
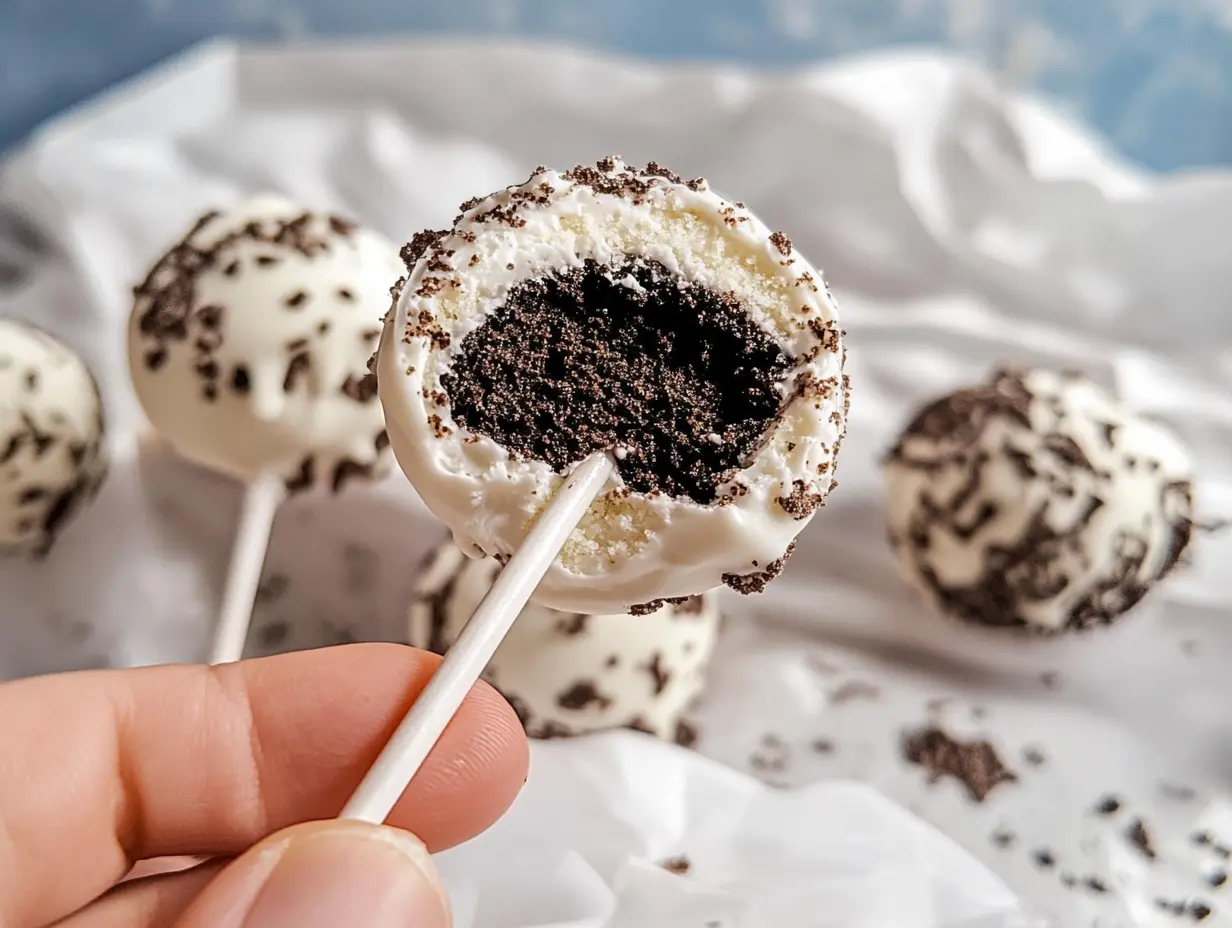
Cookies and Cream Cake Pops are cake balls coated in a smooth layer of melted chocolate, skewered on a lollipop stick, and then rolled in crushed Oreo cookies. These cake pops are a unique twist on traditional cake and are fun to eat while offering the perfect combination of textures. The recipe is versatile, allowing you to customize the flavors and presentation, making them a great addition to any event.
Why You’ll Love These Cake Pops
- Irresistible flavor: The Oreo cookies bring a beloved crunch and creaminess, while the chocolate cake complements it perfectly.
- Easy to make: This recipe uses a box cake mix, making it a quick and simple treat to prepare. The steps are easy to follow, so even beginner bakers can create a delicious dessert.
- Customizable: You can play with the decoration, cake mix flavors, and coatings to suit any occasion or personal preference. The possibilities are endless!
These cake pops are loved by both kids and adults alike, making them the perfect party snack or a fun homemade gift.
Ingredients You’ll Need
Here’s a list of everything you need to make these delectable cookies and cream cake pops:
- 1 box of chocolate cake mix (plus ingredients from the box instructions)
- 1/4 cup powdered sugar
- 10 Oreo cookies, crushed into a powder (reserve a few tbsp for garnish)
- 16 oz white chocolate candy melts (or almond bark, melted)
- 24-30 lollipop sticks
How to Make Cookies and Cream Cake Pops
1: Prepare the Cake
Start by preparing the chocolate cake mix according to the package instructions. Make sure not to overbake the cake, as it can affect the texture of the cake pops. Once the cake is ready, allow it to cool slightly before moving on to the next step.
2: Form the Cake Balls
- While the cake is still warm, crumble it into a large bowl. You can use your hands or a food processor to break it into fine crumbs.
- Add 1/4 cup of powdered sugar and 10 crushed Oreo cookies to the cake crumbs. Mix everything together until a dough-like consistency forms. The dough should be sticky enough to hold its shape when pressed into a ball.
- Using your hands or a cake pop press, portion out the dough and roll it into 1-inch balls. Place them on a baking sheet lined with parchment paper.
- Freeze the cake balls for 30 minutes to help them firm up before dipping them in chocolate.
3: Coat and Assemble the Cake Pops
- Melt the Chocolate: Melt the white chocolate candy melts (or almond bark) in a microwave or double boiler, following the instructions on the package. If you need help choosing the best chocolate for cake pops, visit this resource.
- Insert the Sticks: Dip each lollipop stick about 1/2 inch into the melted chocolate and insert it into the center of each cake ball. This will help the sticks stay in place.
- Coat the Cake Pops: Dip each cake ball into the melted chocolate, swirling it gently to coat it evenly. Allow any excess chocolate to drip off.
- Garnish: Before the chocolate sets, sprinkle crushed Oreo cookies over the top of each cake pop.
4: Let the Cake Pops Set
Place the coated cake pops upright in a cake pop stand or foam block. Allow them to sit for at least 30 minutes, or until the chocolate has completely set.
Once the cake pops are fully set, they are ready to enjoy! You can serve them immediately or store them for later.
Tips for Perfect Cake Pops
- Cool the cake properly: Ensure that the cake is cool enough before mixing it with the other ingredients. Warm cake can be too soft and difficult to work with.
- Don’t overfill the cake pops: The cake balls should not be too large. If they’re too big, they may not hold onto the stick well.
- Use a cake pop stand: For easy drying and a neat presentation, use a cake pop stand or a foam block to hold your pops upright.
Troubleshooting Common Cake Pop Issues
- Cake pops falling off the stick: Make sure to dip the stick in chocolate before inserting it into the cake ball. This creates a seal that helps keep the stick in place.
- Chocolate coating cracking: If the coating cracks, try adding a teaspoon of coconut oil to the melted chocolate. This will help smooth it out and prevent it from hardening too quickly.
Decoration Ideas for Your Cookies and Cream Cake Pops
Enhance your cookies and cream cake pops with creative decorations that fit any occasion. Try these ideas:
- Colorful Sprinkles: Choose fun sprinkles to match your theme, adding color and flair.
- Chocolate Drizzle: Drizzle dark or milk chocolate for a stylish and flavorful touch.
- Personalized Toppers: Use fondant or small decorations for custom cake pops.
- Crushed Oreos: Add extra texture and reinforce the flavor with crushed Oreo cookies.
- Sugar Pearls or Edible Glitter: For a sparkly, glamorous effect, use these to give your cake pops a luxurious finish.
- Dripping Ganache or Caramel: Create an elegant drip effect with chocolate ganache or caramel sauce.
- Themed Wrapping: Wrap cake pops in clear bags with decorative ribbons for a polished, gift-worthy look.
These ideas help make your cake pops not only delicious but also visually stunning for any event.
Frequently Asked Questions
1. How do you store cake pops?
To keep your cookies and cream cake pops fresh, store them in an airtight container at room temperature. They will stay fresh for up to 3 days. If you prefer them to stay firmer, you can refrigerate them for a longer shelf life, but let them come to room temperature before serving to preserve the texture of the chocolate coating. For a more extended storage option, you can freeze the cake pops. Wrap each cake pop individually in plastic wrap, place them in a freezer-safe container, and freeze for up to 2 months. When ready to enjoy, simply thaw them at room temperature for about an hour before serving.
2. Can I freeze cake pops?
Yes, you can freeze cookies and cream cake pops to preserve their freshness. Freezing them is especially helpful if you want to prepare them in advance for an event. To freeze your cake pops, ensure they are fully set and wrapped tightly in plastic wrap. Place them in a single layer in an airtight container or freezer bag. For best results, let them thaw at room temperature for about 30-60 minutes before serving. This will help retain their texture and flavor.
3. Can I make cake pops without a cake pop press?
Absolutely! While a cake pop press can make the shaping process easier, it’s not a necessity. You can simply roll the dough into balls using your hands, ensuring they’re about 1 inch in diameter. If you find that the cake pops are too sticky, you can chill the dough slightly to make it easier to handle. If you don’t have a press, use a spoon to help you portion the dough evenly before rolling into balls.
4. Can I use a different cake mix?
Yes, you can experiment with different types of cake mixes to create your own flavor variations. If you’re not a fan of chocolate, try using a vanilla or red velvet cake mix. For a cookies and cream twist, you can mix in additional crushed Oreo cookies with other flavors to achieve a similar flavor profile. If you’re looking for a gluten-free option, you can use gluten-free cake mix to make sure everyone can enjoy these delicious cake pops.
5. How do I know if my cake pops are ready to be dipped?
Before dipping your cake pops into the melted chocolate, ensure they’ve been chilled for at least 30 minutes. This will help the cake balls firm up and reduce the risk of them falling off the sticks. You should also make sure that the chocolate coating is the right consistency — it should be smooth but not too runny. If the coating is too thin, it will drip off too easily. A thick, velvety consistency is ideal for dipping and coating your cake pops evenly.
6. Can I use other types of chocolate for the coating?
Yes, you can use different types of chocolate to coat your cake pops. While white chocolate is a popular choice for its creamy flavor and light appearance, you can also use milk chocolate or dark chocolate for a more intense flavor. Make sure to use candy melts or high-quality chocolate that’s specifically made for melting, as regular chocolate chips might not melt as smoothly. Alternatively, almond bark is another popular coating for cake pops, especially if you want a more affordable option.
Conclusion
These Cookies and Cream Cake Pops are a delicious and fun treat that everyone will love. With their simple preparation and customizable options, they’re perfect for any occasion, whether it’s a birthday party, a holiday gathering, or just a sweet snack at home. Try making them today, and you’ll be amazed at how quickly they disappear!
Print
Cookies and Cream Cake Pops Recipe
- Author: Madilyn
- Total Time: 1 hour
- Yield: 30 cake pops 1x
Ingredients
- 1 box of chocolate cake mix (plus ingredients listed on the box)
- 1/4 cup powdered sugar
- 10 Oreo cookies, crushed into fine crumbs
- 16 oz of white chocolate candy melts (Ghirardelli brand recommended)
- 24–30 lollipop sticks
Instructions
- Bake the Cake: Start by preparing the chocolate cake mix according to the instructions on the box. Be careful not to overbake it to keep it moist.
- Mix the Dough: While the cake is still warm, transfer it to a stand mixer. Add powdered sugar and the crushed Oreo cookies, saving a few tablespoons of crumbs for later use. Mix on low speed until the dough comes together and can be pressed into a ball.
- Shape the Cake Pops: Roll the dough into small, bite-sized balls with your hands, or use a cake pop press for a uniform shape. Arrange them on a baking sheet and place them in the freezer to chill.
- Prepare the Chocolate Coating: Melt the white chocolate candy melts either in the microwave or using a double boiler. Follow the package directions for best results.
- Insert the Sticks: Once the chocolate is melted, dip the end of each lollipop stick into the chocolate, then gently insert it into the center of each cake ball. This will help the sticks stay in place.
- Chill Again: Return the cake pops to the fridge or freezer to allow the chocolate coating on the stick to harden.
- Dip and Decorate: Pour the melted chocolate into a tall glass or jar for easy dipping. Dip each cake pop into the chocolate, allowing any excess to drip off. While the chocolate is still wet, sprinkle the reserved Oreo crumbs on top for extra texture and flavor.
- Set and Serve: Stand the cake pops upright in a foam block or a cardboard box with holes until the chocolate hardens. Once set, you can enjoy them as-is or wrap them individually in decorative bags with ribbons.
Notes
- Store at room temperature for up to 3 days.
- For longer storage, freeze for up to 2 months and let thaw at room temperature before serving.
- Cook Time: 20 minutes