
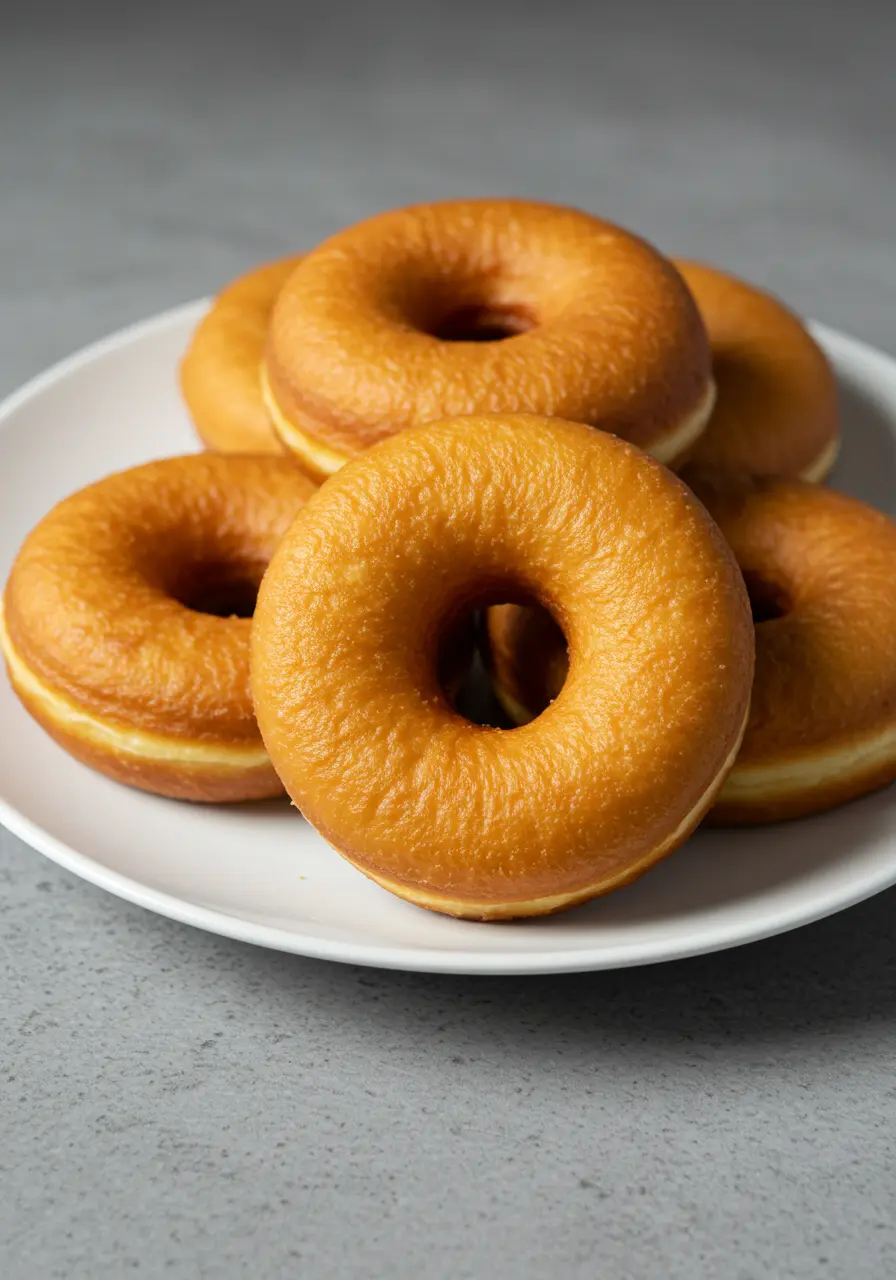
Crispy and Glazed Doughnuts are the ultimate indulgent treat, offering the perfect combination of golden crunch on the outside and soft, melt-in-your-mouth sweetness on the inside—ideal for breakfast, dessert, or anytime you’re craving a classic, homemade doughnut experience.
The Secret to Perfect Crispy and Glazed Doughnuts
Achieving bakery-quality crispy and glazed doughnuts at home isn’t as intimidating as it might seem! This top-rated recipe produces light, airy doughnuts with a satisfying crisp exterior and that classic sweet glaze that perfectly coats each bite. The best part? You don’t need professional equipment or culinary school training—just a little patience and our detailed instructions.
How to Make Crispy and Glazed Doughnuts
You’ll find the complete recipe below with detailed instructions, but here’s an overview of what to expect when creating these irresistible treats:
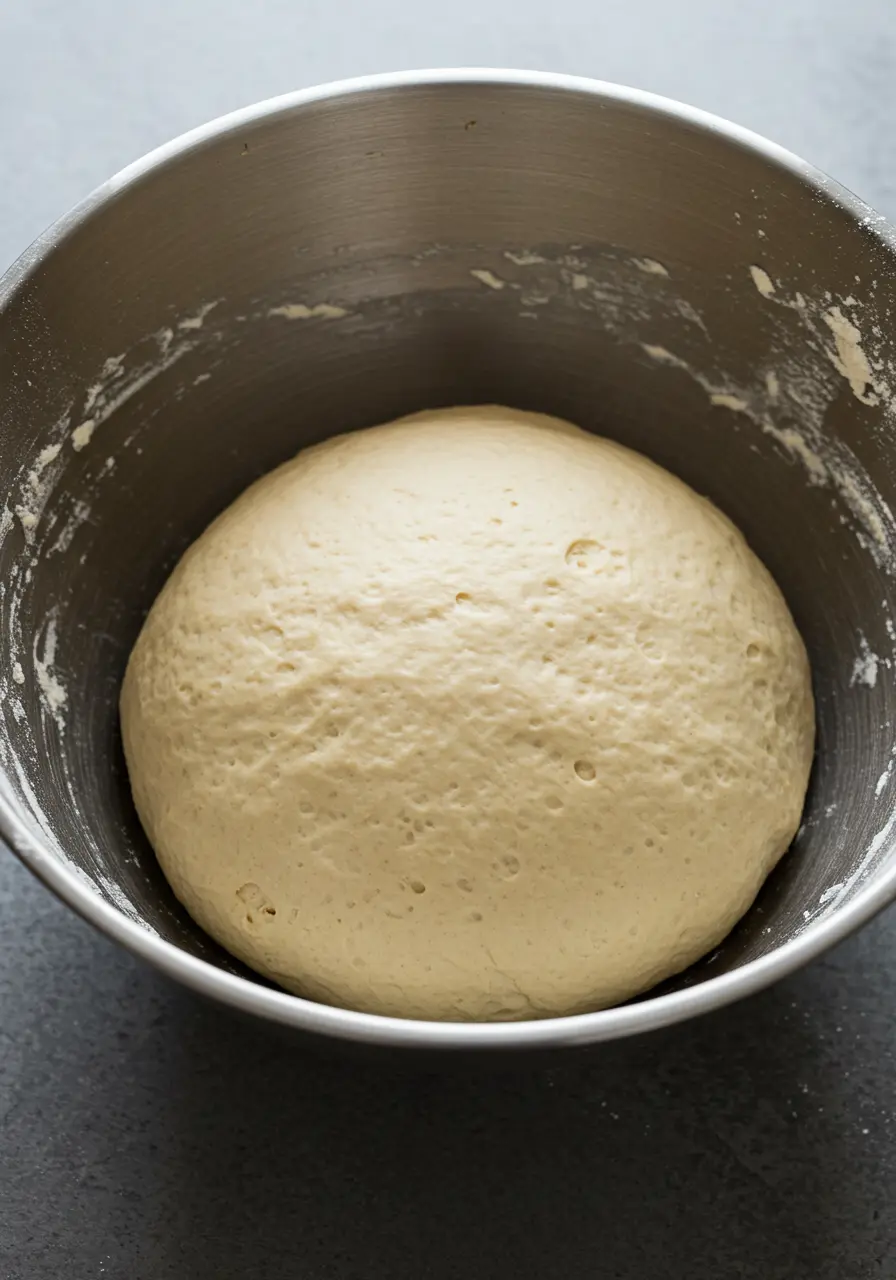
Begin by activating your yeast in lukewarm milk with a touch of sugar—this is called “blooming” and ensures your doughnuts will rise beautifully. Next, you’ll combine your wet and dry ingredients to form a soft, elastic dough that needs to rise until doubled in size.
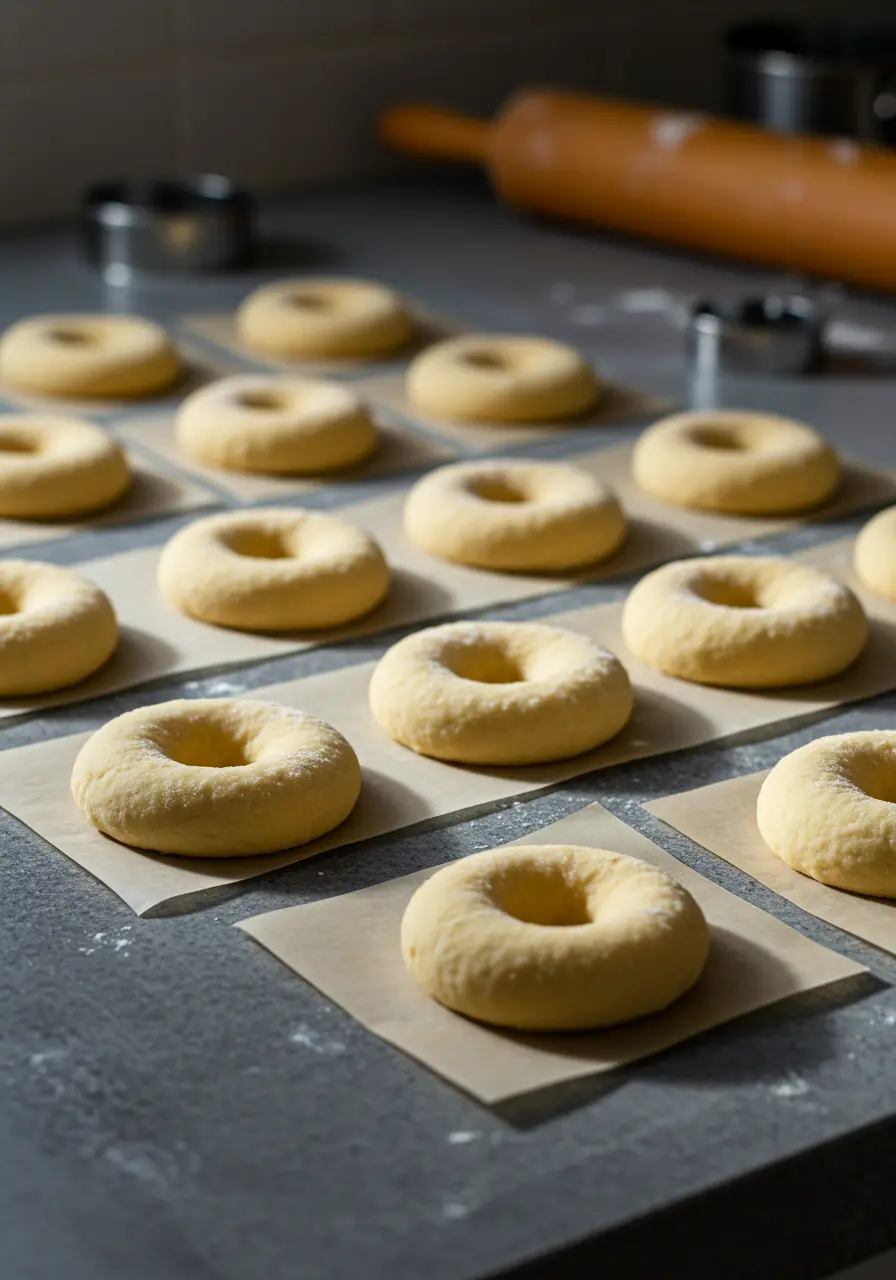
After the first rise, you’ll roll out the dough and cut your doughnut shapes before allowing them to rise again. The second rise is crucial for achieving that perfect texture. Finally, you’ll fry the doughnuts until golden brown and dip them in a sweet vanilla glaze while still warm.
Understanding Dough Basics
Success with crispy and glazed doughnuts starts with properly prepared dough. When blooming your yeast, the liquid should be lukewarm—too hot will kill the yeast, while too cold won’t activate it. You’ll know your yeast is active when it creates a foamy layer on top of the liquid after about 8-10 minutes.
When kneading, aim for a dough that feels smooth and elastic. To test if it’s ready, press your thumb lightly into the dough—it should bounce back within about 5 seconds. This indicates that the gluten has developed properly, which is essential for that perfect doughnut texture.
The Rising Process
Patience is key when making crispy and glazed doughnuts. The dough needs to rise twice: first as a whole dough ball, then again after cutting into doughnut shapes. Find a warm, draft-free spot in your kitchen for optimal rising conditions. In cooler kitchens, you can create a proofing environment by briefly heating your oven, then turning it off before placing the covered dough inside.
During the second rise, your cut doughnuts should look noticeably puffier and more voluminous. This rise is what gives them that characteristic light, airy texture that makes homemade doughnuts so special.
Frying for Perfect Results
Temperature control is crucial for achieving perfectly crispy and glazed doughnuts. A cooking thermometer is highly recommended to maintain the oil at 350°F (175°C). This temperature ensures the doughnuts cook through without absorbing excess oil or burning on the outside.
Remember that the oil temperature will drop slightly when you add the doughnuts, so adjust your heat as needed to maintain consistency. Each doughnut needs only about 1 minute per side—watch for that beautiful golden-brown color as your indicator.

How to Make the Perfect Glaze
The finishing touch for amazing crispy and glazed doughnuts is a smooth, sweet glaze that sets to a perfect sheen. For best results, prepare your glaze while the shaped doughnuts are on their second rise, so it’s ready when your freshly fried treats emerge from the oil.
The ideal glaze consistency is thin enough to coat smoothly but thick enough to adhere well to the doughnuts. If needed, adjust by adding tiny amounts of milk to thin or more powdered sugar to thicken. Always dip your doughnuts while they’re still warm for the best adhesion and that classic bakery-style finish.
How to Store Your Doughnuts
Freshly made crispy and glazed doughnuts are best enjoyed the same day they’re made, ideally still slightly warm. However, if you have leftovers, store them in an airtight container at room temperature for up to two days. Place parchment paper between layers to prevent sticking.
For longer storage, freeze unglazed doughnuts for up to three months. When ready to enjoy, thaw at room temperature and warm briefly in the microwave before glazing.
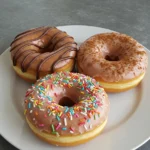
Creative Variations
Once you’ve mastered basic crispy and glazed doughnuts, try these delicious variations:
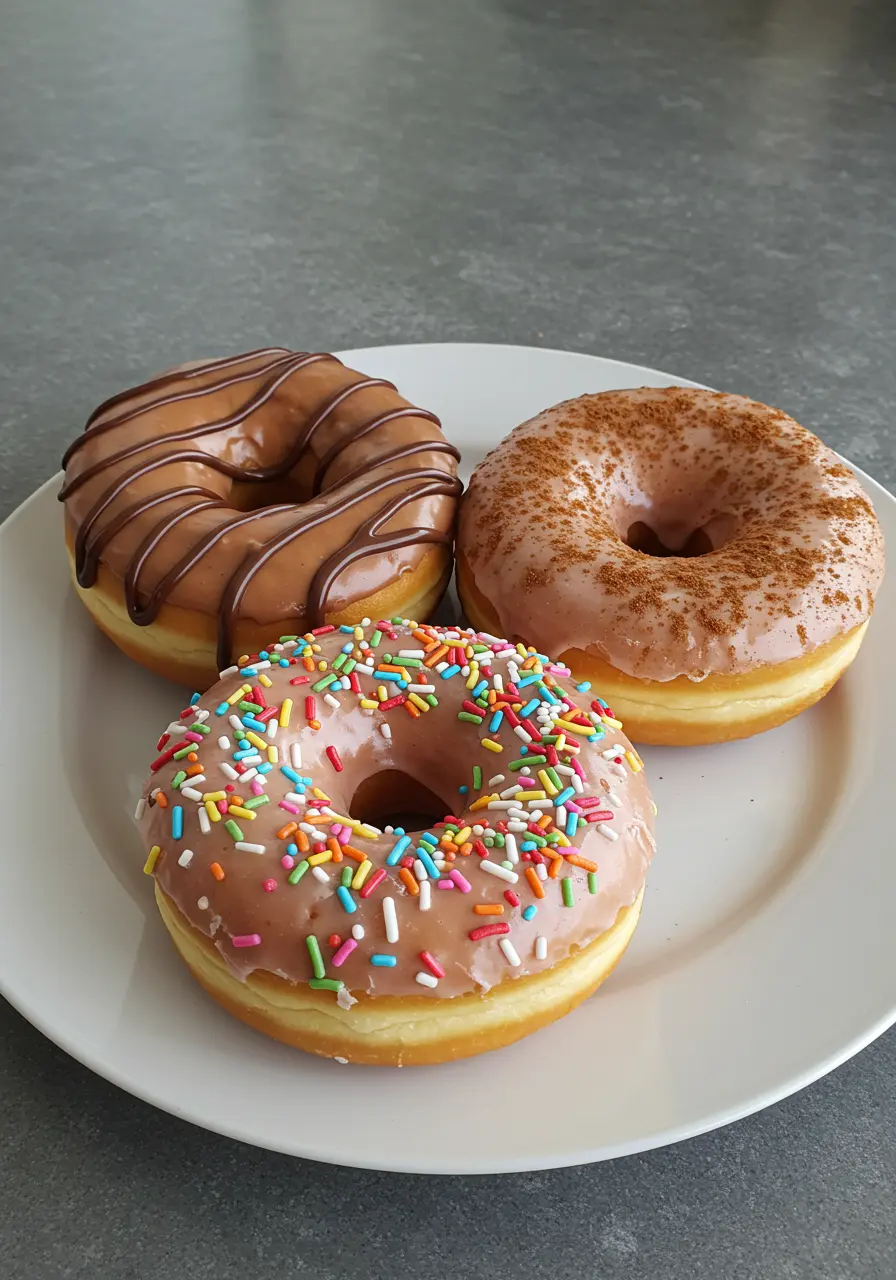
- Add a teaspoon of cinnamon to the glaze for a subtle spiced flavor
- Top with colorful sprinkles while the glaze is still wet
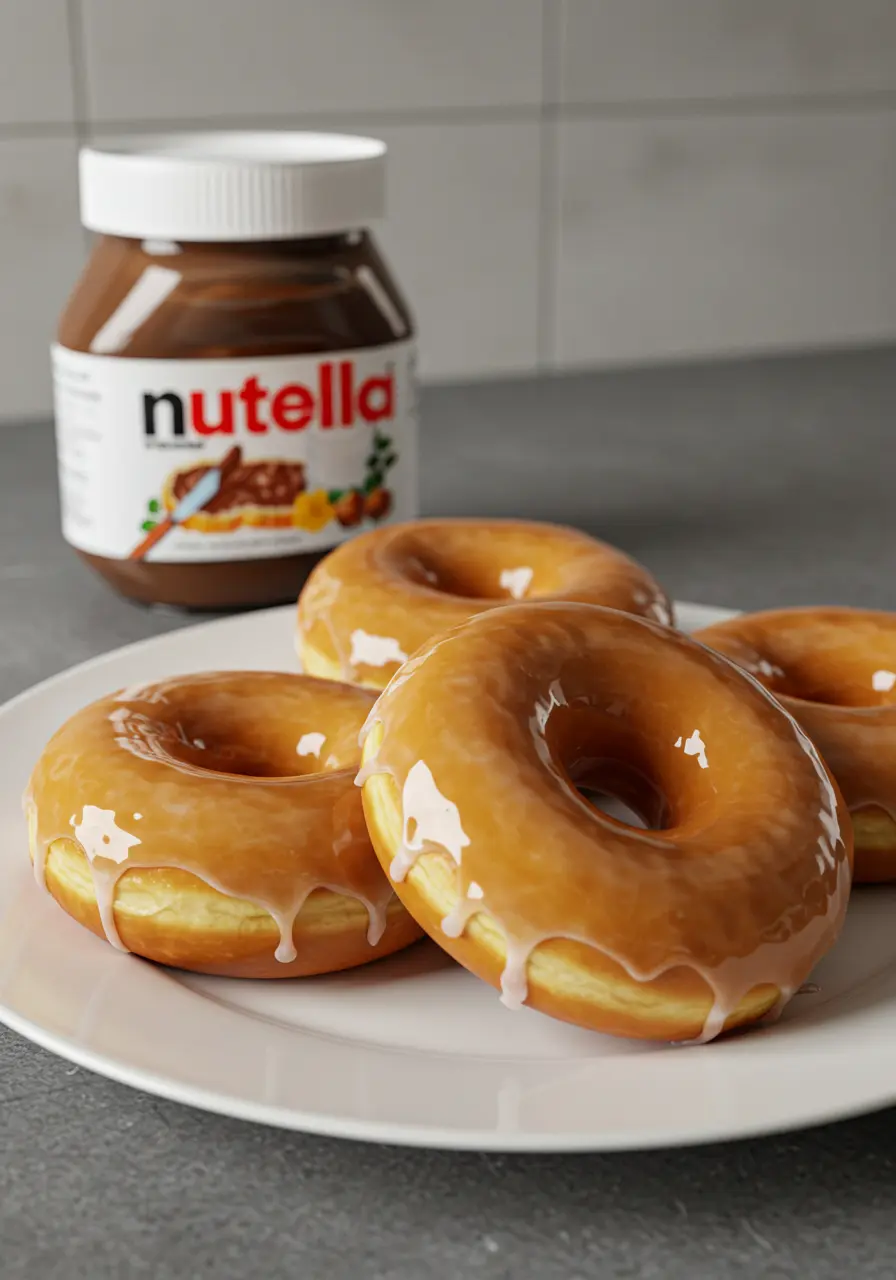
- Drizzle with melted chocolate after the glaze has set
- Add a touch of citrus zest to the glaze for a bright, fresh flavorPrint
Crispy and Glazed Doughnuts
Description
Crispy on the outside, glazed to perfection—these doughnuts are a homemade treat you’ll crave again and again.
Ingredients
ScaleFor the Dough:
- 1 cup whole milk
- ¼ cup plus 1 teaspoon granulated sugar, divided
- 1 packet (2¼ teaspoons) active dry yeast
- 4½ cups all-purpose flour, plus more for dusting
- ½ teaspoon kosher salt
- 6 tablespoons unsalted butter, melted
- 2 large eggs, room temperature
- ½ teaspoon pure vanilla extract
- Vegetable or canola oil, for frying
For the Glaze:
- ¼ cup whole milk
- 2 cups powdered sugar
- ½ teaspoon pure vanilla extract
Instructions
- Prepare the Yeast Mixture: Heat the milk in a microwave-safe bowl until lukewarm (about 105°F), approximately 40 seconds. Remove from microwave and stir in 1 teaspoon of sugar until dissolved. Sprinkle the yeast over the warm milk mixture and let sit until foamy, about 8-10 minutes. This tells you the yeast is active and ready to work.
- Mix the Dough: In a medium bowl, whisk together the flour and salt. In a separate large bowl, combine the remaining sugar, melted butter, eggs, and vanilla with a wooden spoon. Pour in the activated yeast mixture and stir to combine. Gradually add the dry ingredients, mixing until a shaggy dough forms.
- Knead and First Rise: Transfer the dough to a lightly floured surface and knead until smooth and elastic, about 5 minutes. Add small amounts of additional flour if the dough feels too sticky. Form the dough into a tight ball and place in a greased bowl, turning once to coat. Cover with a clean kitchen towel and let rise in a warm spot until doubled in size, approximately 1 hour.
- Shape the Doughnuts: Line a large baking sheet with parchment paper. After the dough has doubled, gently punch it down to release air bubbles. Turn onto a lightly floured surface and roll to ½-inch thickness. Using a doughnut cutter (or 3-inch and 1-inch round cutters), cut out doughnut shapes. Re-knead scraps and continue cutting until all dough is used. Place cut doughnuts and holes on the prepared baking sheet.
- Second Rise: Cover the cut doughnuts with a clean kitchen towel and allow to rise again until noticeably puffed, about 40-45 minutes. During this time, prepare your glaze and set up your frying station.
- Prepare the Glaze: In a wide, shallow bowl, whisk together milk, powdered sugar, and vanilla until completely smooth. The consistency should be thin enough to create a smooth coating but thick enough to adhere well to the doughnuts. Set aside.
- Fry the Doughnuts: Line another baking sheet with paper towels. Heat 2 inches of oil in a large, heavy-bottomed pot or Dutch oven to 350°F (175°C). Carefully lower 2-3 doughnuts into the hot oil using a slotted spoon or spatula. Fry until golden brown on one side, about 1 minute, then flip and fry the other side until equally golden, about 1 minute more. Doughnut holes will cook even faster, requiring only about 30 seconds per side.
- Glaze While Warm: Transfer fried doughnuts to the paper towel-lined baking sheet to drain briefly, about 30 seconds. While still warm, dip each doughnut into the glaze, ensuring both sides are coated. Place on a wire rack positioned over a baking sheet to catch drips. Allow the glaze to set for a few minutes before serving.
- Enjoy: These crispy and glazed doughnuts are best enjoyed fresh and slightly warm, when the contrast between the crisp exterior and tender interior is at its peak!
Notes
Nutritional information is an estimate based on typical ingredients and cooking methods. Actual values may vary.
Editor’s Note: This recipe was thoroughly tested and approved by our kitchen team. For best results, use a thermometer when heating your oil to ensure consistent cooking temperature.
Prep Time: 25 mins
Cook Time: 20 mins
Additional Time: 1 hr 45 mins
Total Time: 2 hrs 30 mins
Servings: 16